Overview
In this guide, you can learn how to create a Mongoid web application that uses Sinatra as the web framework. Sinatra is a domain-specific language (DSL) for creating web applications in Ruby. Sinatra applications are simple to set up and can provide faster request processing than other frameworks.
The application in this tutorial consists of the following layers:
Database layer: MongoDB provides data storage and retrieval.
Application layer: Sinatra handles HTTP requests, routing, and logic processing.
Presentation layer: Embedded Ruby templates render restaurant data on web pages.
Tip
To learn how to integrate Mongoid into an existing application, see the Add Mongoid to an Existing Application guide.
Why Use MongoDB with Mongoid and Sinatra?
By integrating MongoDB with Mongoid and Sinatra, you can use Mongoid's Object-Document Mapper (ODM) to interact with MongoDB's flexible document model. Mongoid provides a lightweight alternative to Rails' Active Record ORM, and you can leverage MongoDB's schema flexibility while using Sinatra's minimalist approach to easily control how your data is modeled and displayed.
Quick Start Tutorial
This tutorial shows you how to build a web application that uses Ruby and Sinatra. The application accesses sample restaurant data, queries the data, and displays the results on a locally hosted site. The tutorial also includes instructions for connecting to a MongoDB cluster hosted on MongoDB Atlas and accessing and displaying data from your database.
Set Up Your Project
Follow the steps in this section to install the project dependencies, create an Atlas cluster, and set up the application structure.
Create a MongoDB Atlas cluster.
MongoDB Atlas is a fully managed cloud database service that hosts your
MongoDB deployments. If you do not have a MongoDB deployment, you can create a MongoDB
cluster for free by completing the
MongoDB Get Started
tutorial. The MongoDB Get Started tutorial also demonstrates how to load sample
datasets into your cluster, including the sample_restaurants database
that is used in this tutorial.
To connect to your MongoDB cluster, you must use a connection URI. To learn how to retrieve your connection URI, see the Add your connection string section of the MongoDB Get Started tutorial.
Important
Save your connection string in a secure location.
Specify the target database in your connection string.
When connecting to an Atlas cluster, you must specify the database that you want to interact with as the default database in your connection string. You must add the database name to your connection string after the hostname and before the connection options.
The following example specifies the sample_restaurants target database
in a sample connection string:
mongodb+srv://user0:pass123@mongo0.example.com/sample_restaurants?retryWrites=true&w=majority
The sample connection string includes the database after the mongo0.example.com
hostname and before the retryWrites and w connection options.
Create a Gemfile and add gems.
All Ruby applications must have a Gemfile that lists
the required gems. Run the following command to create a
Gemfile in your application:
touch Gemfile
Then, run the following commands to add the required gems to the
Gemfile and install them:
bundle add mongoid sinatra rackup webrick bundle install
Configure the Back End
After setting up the project structure and dependencies, follow the steps in this section to connect to MongoDB and set up your data models.
Configure your MongoDB connection.
In your my-sinatra-app directory, create a config
subdirectory. Then, create a file in this subdirectory called mongoid.yml.
Paste the following code into the mongoid.yml file:
development: clients: default: uri: <connection string>
Replace the <connection string> placeholder with the connection URI that you saved
in a previous step. Ensure that the URI
includes the sample_restaurants database name.
Create the application file.
In your my-sinatra-app directory, create a file called app.rb.
Paste the following contents into the app.rb file to
load the necessary gems and your configuration file:
require 'sinatra' require 'mongoid' Mongoid.load!(File.join(File.dirname(__FILE__), 'config', 'mongoid.yml'))
Create a data model.
In the app.rb file, create a model called Restaurant
by adding the following code:
class Restaurant include Mongoid::Document field :name, type: String field :cuisine, type: String field :borough, type: String end
The Restaurant model represents the restaurants collection in
the sample_restaurants database. It defines name, cuisine,
and borough fields to store restaurant data.
Add custom routes.
In the app.rb file, add the following routes for displaying
restaurant data:
get '/' do @restaurants = Restaurant.all erb :index end get '/browse' do @restaurants = Restaurant .where(name: /Moon/i).and(borough: "Queens") erb :browse end
The / route displays all restaurants, while the /browse route
queries for restaurants in Queens that have "Moon" in their name
by using a case-insensitive match.
Configure the Front End
After setting up the data layer, follow the steps in this section to create templates for the user interface.
Create the main layout template.
In your my-sinatra-app directory, create a subdirectory
called views.
Then, create a file in the views subdirectory called layout.erb and paste
the following code:
<!DOCTYPE html> <html> <head> <title>Restaurant Directory</title> <style> body { font-family: Arial, sans-serif; margin: 0; padding: 20px; background-color: #a8d5ba; } .header { text-align: center; margin-bottom: 30px; } .nav { text-align: center; margin-bottom: 20px; } .nav a { text-decoration: none; color: #6a9bd2; margin: 0 10px; font-size: 16px; } .container { max-width: 1200px; margin: 0 auto; background: white; padding: 20px; border-radius: 10px; } .restaurant-grid { display: grid; grid-template-columns: repeat(auto-fill, minmax(300px, 1fr)); gap: 20px; margin-top: 20px; } .restaurant-card { background: #f8f9fa; padding: 20px; border-radius: 8px; border: 1px solid #ddd; } .restaurant-card h3 { margin-top: 0; color: #333; } .cuisine-tag { background: #4a9d5f; color: white; padding: 4px 8px; border-radius: 4px; font-size: 12px; display: inline-block; } </style> </head> <body> <div class="header"> <h1>Restaurant Directory</h1> </div> <div class="nav"> <a href="/">All Restaurants</a> <a href="/browse">Browse Filtered Restaurants</a> </div> <div class="container"> <%= yield %> </div> </body> </html>
This file is an Embedded Ruby (ERB) template. These templates include HTML with embedded Ruby code used for generating dynamic HTML content.
Create the restaurant list view.
In the views subdirectory, create a file called index.erb and paste
the following code:
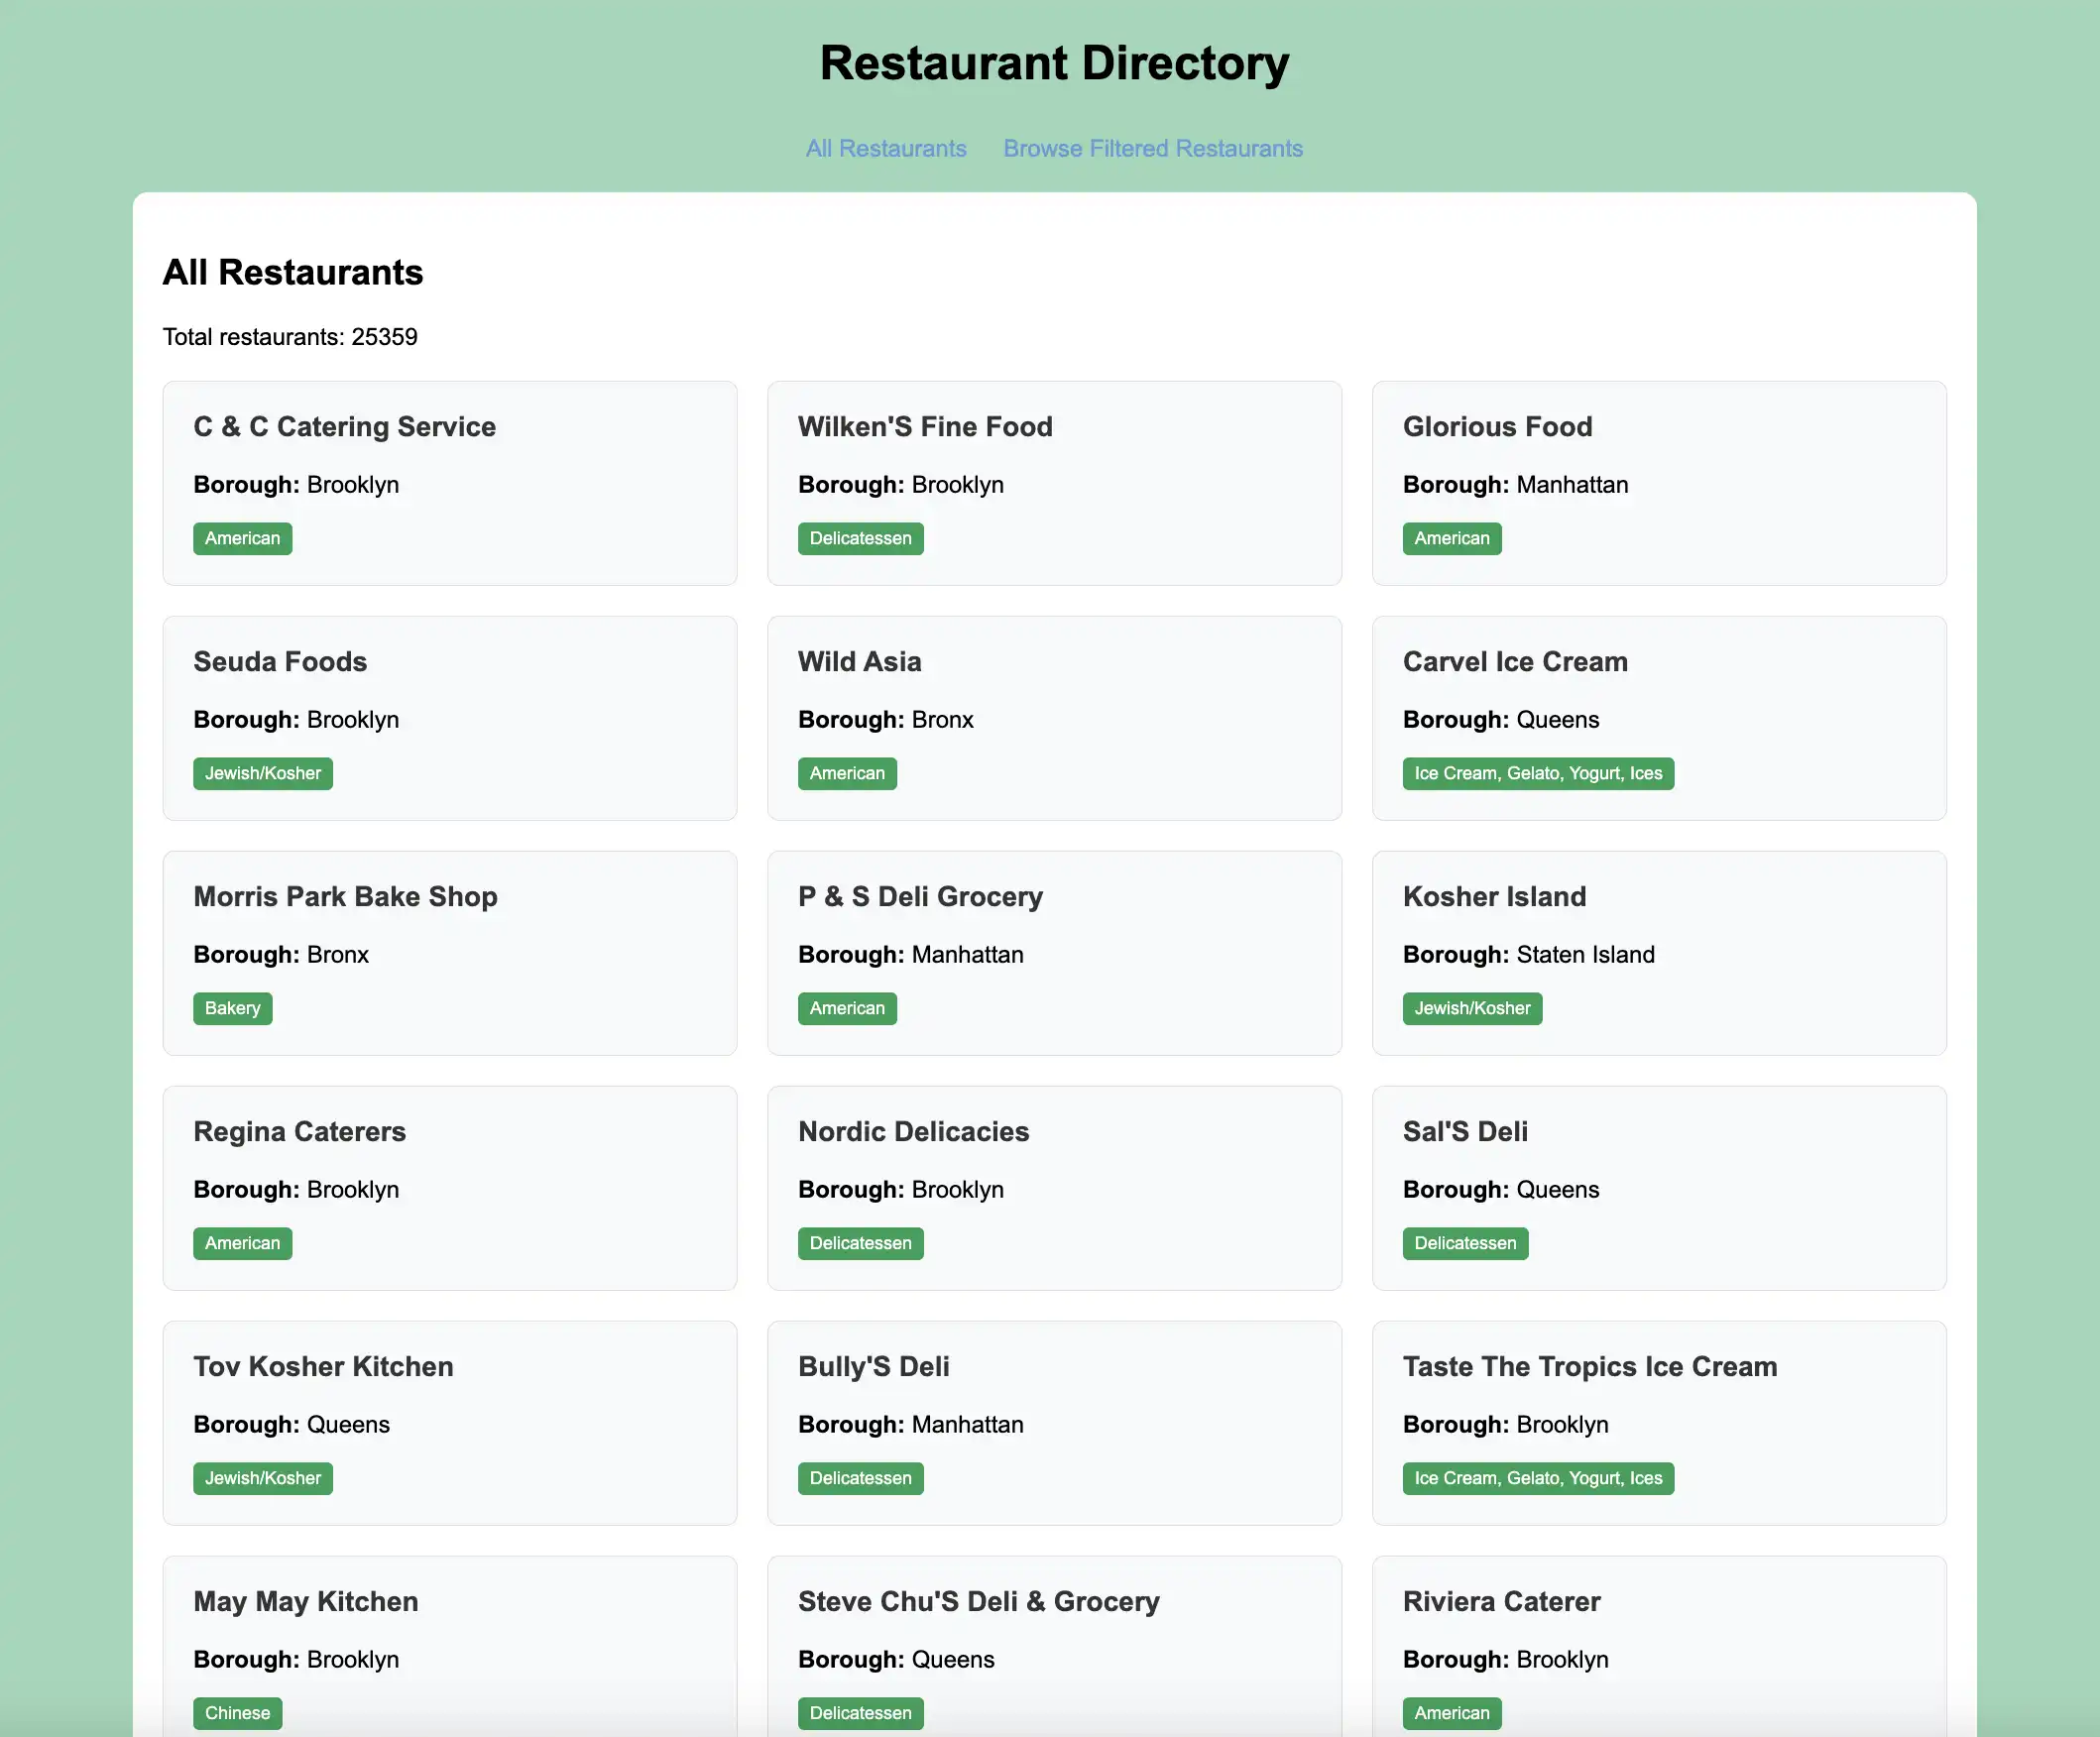
<h2>All Restaurants</h2> <p>Total restaurants: <%= @restaurants.count %></p> <div class="restaurant-grid"> <% @restaurants.each do |restaurant| %> <div class="restaurant-card"> <h3><%= restaurant.name %></h3> <p><strong>Borough:</strong> <%= restaurant.borough %></p> <span class="cuisine-tag"><%= restaurant.cuisine %></span> </div> <% end %> </div>
This view file displays all restaurants in a grid layout in the application user interface.
Create the filtered view.
In the views subdirectory, create a file called browse.erb and paste
the following code:
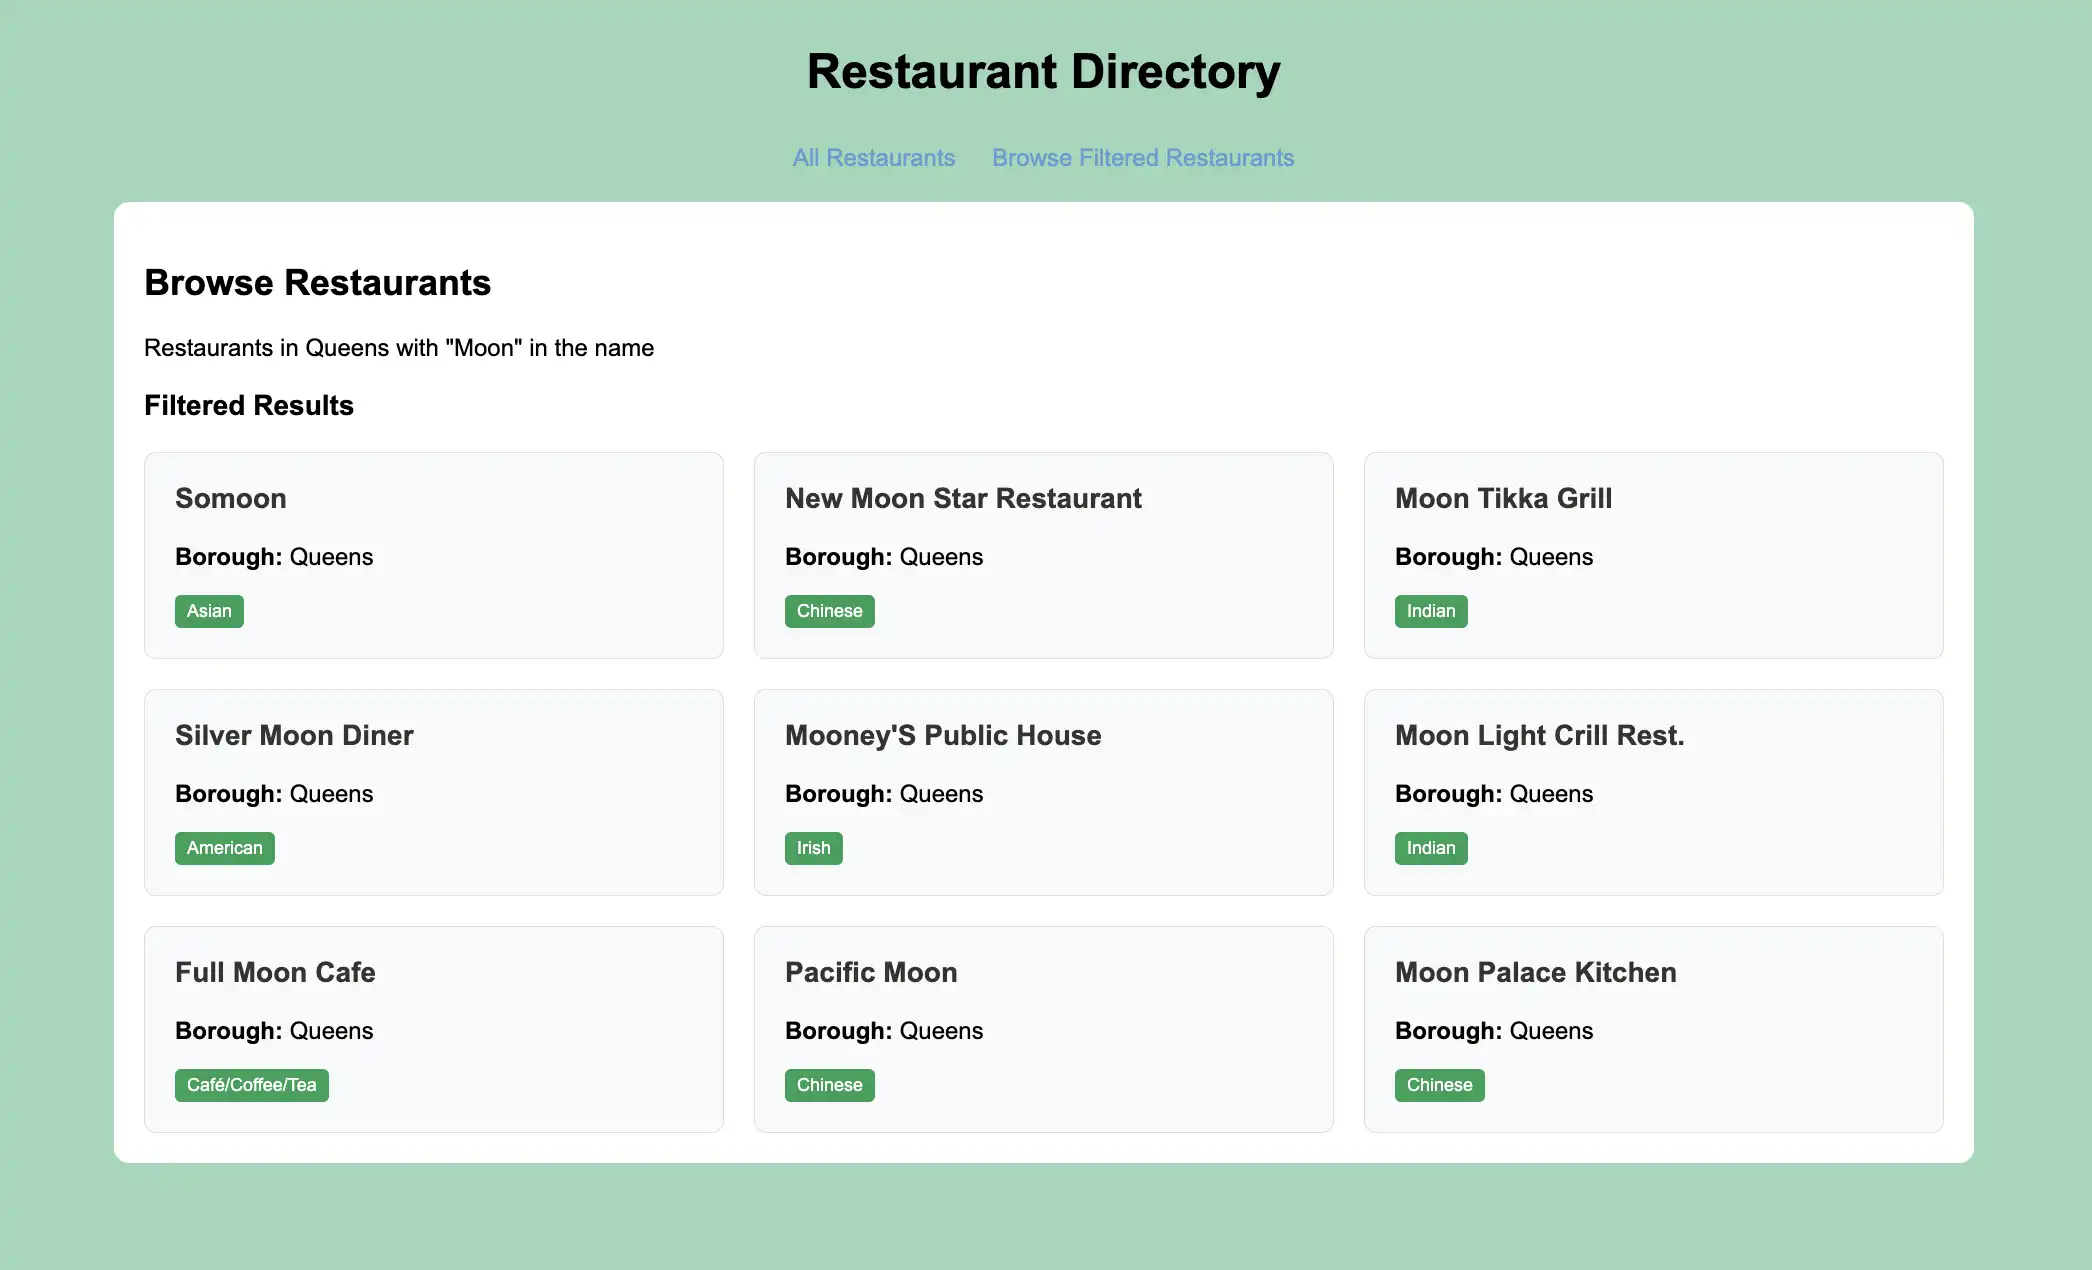
<h2>Browse Restaurants</h2> <p>Restaurants in Queens with "Moon" in the name</p> <h3>Filtered Results</h3> <div class="restaurant-grid"> <% @restaurants.each do |restaurant| %> <div class="restaurant-card"> <h3><%= restaurant.name %></h3> <p><strong>Borough:</strong> <%= restaurant.borough %></p> <span class="cuisine-tag"><%= restaurant.cuisine %></span> </div> <% end %> </div>
This view file displays the restaurants from the custom browse route,
which filters for restaurants in Queens that have "Moon" in their name.
Run Your Application
Finally, follow the steps in this section to run your web application and explore the restaurant data by using the browser interface.
Start the Sinatra application.
Navigate to your project directory and run the following command:
bundle exec ruby app.rb
This command starts a web server on port 4567, Sinatra's default port. If successful, the command output resembles the following example:
[2024-10-01 12:36:49] INFO WEBrick 1.8.2 [2024-10-01 12:36:49] INFO ruby 3.2.5 (2024-07-26) [arm64-darwin23] == Sinatra (v4.0.0) has taken the stage on 4567 for development with backup from WEBrick [2024-10-01 12:36:49] INFO WEBrick::HTTPServer#start: pid=79176 port=4567
Open the web application.
Open http://localhost:4567 in your web browser. The initial
landing page displays all restaurants in the sample_restaurants.restaurants
collection, in the order they appear in the database:

Then, click the Browse Filtered Restaurants link to view restaurants in Queens that
have "Moon" in their name:

Congratulations on completing the Sinatra Quick Start tutorial! After you complete these steps, you have a Ruby and Sinatra web application that connects to your MongoDB deployment, runs queries on sample restaurant data, and displays the results on a locally hosted web interface.
Additional Resources
To learn more about Ruby, Sinatra, Mongoid, and MongoDB, view the following resources:
Sinatra documentation
Ruby language documentation
Model Your Data: Learn how to customize your Mongoid models.
Interact with Data: Learn how to interact with your MongoDB data by using Mongoid models.
Tip
Other Framework Tutorials
If you prefer to use Rails as your web framework, see the Integrate Mongoid with Ruby on Rails guide.