Overview
This guide demonstrates how to build a modern web application with TanStack Start and MongoDB. TanStack Start is a full-stack framework that integrates frontend and backend development by using React and popular libraries like TanStack Router and TanStack Query from the TanStack ecosystem.
The application in this tutorial consists of the following layers:
Database Layer: MongoDB stores and retrieves data.
Server Layer: TanStack Start provides the API endpoints and logic to connect your frontend to your MongoDB database.
Data Management Layer: TanStack Query manages server-side state on the frontend, unifying the logic for data fetching, loading states, and error handling.
Presentation Layer: React implements the UI by using the TanStack Query data.
Why Use MongoDB in a TanStack Start Application?
MongoDB's document model stores data as JSON-like documents, making it easy to work with JavaScript objects without complex mapping. This aligns with TanStack Start's React components and TypeScript interfaces.
TanStack Query handles the data layer efficiently by caching MongoDB responses, managing loading states, and synchronizing data across components. This eliminates manual state management and reduces redundant database calls.
This combination works well for applications that need the following features:
Flexible data structures that can evolve over time
Real-time data updates with minimal client-side code
Type safety from database to UI
Efficient caching and background data synchronization
Quick Start Tutorial
This tutorial guides you through building a TanStack Start application that integrates with MongoDB. The application accesses sample restaurant data and displays the results on a locally hosted site. It includes instructions on connecting your MongoDB cluster hosted on MongoDB Atlas and accessing and displaying information from your database.
Tip
If you prefer to connect to MongoDB by using the Node.js driver without TanStack Start, see the Get Started with the Node.js Driver guide.
Set Up Your Project
Follow the steps in this section to install project dependencies, create an Atlas cluster, and set up the application directories.
Verify the prerequisites
To create the Quick Start application, ensure you have the following software installed:
Prerequisite | Notes |
|---|---|
Use version 20 or later. | |
Code Editor | This tutorial uses Visual Studio Code, but you can use the editor of your choice. |
Terminal | For MacOS users, use Terminal or similar app. For Windows users, use PowerShell. |
Create a MongoDB Atlas cluster
MongoDB Atlas is a fully managed cloud database service that hosts your MongoDB
deployments. If you do not have a MongoDB deployment, create a free cluster
(no credit card required) by completing the
MongoDB Get Started tutorial.
The MongoDB Get Started tutorial also demonstrates how to load sample databases into
your cluster, including the sample_restaurants database that is used in this
tutorial.
To connect to your cluster, you must use a connection URI. To retrieve your connection URI, follow the instructions in the Connect to Your Cluster tutorial in the Atlas documentation.
Tip
Save your connection URI in a secure location.
Create the project skeleton
Use the official TanStack Start CLI to initialize the project skeleton. Open your terminal and navigate to your desired project directory.
Run the initialization command:
npm create @tanstack/start@latest
Configuration Prompts
The installation wizard guides you through the setup. Select the following options:
Prompt | Input | Action |
|---|---|---|
What would you like to name your project? | Your desired project name | Type the name, press Enter |
Would you like to use Tailwind CSS? | Yes | Type Y, press Enter |
Select a toolchain | Default (None) | Select None, press Enter |
Select your deployment adapter | Default: (Nitro) | Press Enter |
What add-ons would you like for your project? | None | Press Enter (TanStack Query will be installed manually) |
Would you like any examples? | None | Press Enter |
After installation completes, navigate into your project directory.
Configure Vite for MongoDB compatibility
TanStack Start uses Vite as the build tool. By default,
Vite attempts to bundle dependencies for the browser. However,
the Node.js Driver relies on mongodb-client-encryption, a
server-side native module that causes errors when Vite bundles
it for browser environments.
To prevent this, configure Vite to exclude the
mongodb-client-encryption module from optimization and
server-side rendering.
Navigate to vite.config.ts in your project root and
replace the contents with the following code:
import { defineConfig } from 'vite' import { devtools } from '@tanstack/devtools-vite' import { tanstackStart } from '@tanstack/react-start/plugin/vite' import viteReact from '@vitejs/plugin-react' import viteTsConfigPaths from 'vite-tsconfig-paths' import tailwindcss from '@tailwindcss/vite' import { nitro } from 'nitro/vite' const config = defineConfig({ plugins: [ devtools(), nitro(), // this is the plugin that enables path aliases viteTsConfigPaths({ projects: ['./tsconfig.json'], }), tailwindcss(), tanstackStart(), viteReact(), ], optimizeDeps: { // Exclude this server-side dependency to avoid bundling errors exclude: ['mongodb-client-encryption'], }, ssr: { // Ensure this module is externalized during server-side rendering external: ['mongodb-client-encryption'], }, }) export default config
Configure the Back End
After setting up the project structure, follow the steps in this section to set up the backend.
Configure your environment variable
Create a .env file at the root of your project to securely store your
connection URI.
Run the following command in your project root:
touch .env
Open the .env file and add your connection URI:
MONGODB_URI=<Your Connection URI>
Note
Replace <Your Connection URI> with the connection URI you
received from MongoDB Atlas.
Create the database connection
Create a dedicated TypeScript file to initialize the MongoDB client.
Run the following commands in your project root to create the file structure:
mkdir -p src/lib touch src/lib/db.ts
Open src/lib/db.ts and paste the following code:
import { MongoClient } from "mongodb" // Connection string from the MongoDB atlas dashboard const uri = process.env.MONGODB_URI let connected = false let client: MongoClient export async function connectToDatabase() { if (!uri) { throw new Error("MONGODB_URI is not defined in environment variables") } if (!connected) { try { client = new MongoClient(uri) await client.connect() connected = true } catch (error) { throw new Error(`Failed to connect to database: ${error instanceof Error ? error.message : 'Unknown error'}`) } } return client.db("sample_restaurants") }
This file contains the connectToDatabase() function that connects to
your MongoDB cluster, and to the sample_restaurants database. The
sample_restaurants database contains restaurant data from New York City
including fields like restaurant name, cuisine type, borough, and
address information.
Create the server functions
TanStack Start uses server functions to run code securely on the server. Create a dedicated file to handle the database queries.
Run the following commands in your project root to create
a restaurants.ts file:
mkdir -p src/server touch src/server/restaurants.ts
Open src/server/restaurants.ts and paste the following code:
import { createServerFn } from "@tanstack/react-start" import { connectToDatabase } from "../lib/db" export interface Restaurant { _id: string address: { building: string coord: [number, number] street: string zipcode: string } borough: string cuisine: string name: string restaurant_id: string } // Gets a list of all restaurants from the database export const getAllRestaurants = createServerFn({ method: 'GET'}) .handler(async () => { const db = await connectToDatabase() const restaurants = await db .collection<Restaurant>("restaurants") .find({}) .limit(100) .toArray() return restaurants.map((restaurant) => ({ ...restaurant, _id: restaurant._id.toString(), })) }) // Gets a list of restaurants in Queens with "Moon" in the name export const getRestaurantsByBorough = createServerFn({ method: 'GET'}) .handler(async () => { const db = await connectToDatabase() const restaurants = await db .collection<Restaurant>("restaurants") .find({ borough: 'Queens', name: {$regex: 'Moon', $options: 'i'} // case-insensitive match }) .limit(100) .toArray() // Convert ObjectId to string for client-side serialization return restaurants.map((restaurant) => ({ ...restaurant, _id: restaurant._id.toString(), })) })
This file contains two functions,
getAllRestaurants() and getRestaurantsByBorough(). These two
functions query your MongoDB cluster and return the requested
data.
Configure the Front End
After setting up the database and server layer, follow the steps in this section to complete the data management and presentation layer.
Create the header component
Navigate to src/components/Header.tsx and replace the content with the
following code:
import { Link } from "@tanstack/react-router" export function Header() { return( <> <nav className="bg-white px-6 py-2 shadow-md"> <div className="flex justify-between items-center gap-8"> <Link to ="/"> <img alt="MongoDB logo" className="h-10 inline" src="https://d3cy9zhslanhfa.cloudfront.net/media/3800C044-6298-4575-A05D5C6B7623EE37/4B45D0EC-3482-4759-82DA37D8EA07D229/webimage-8A27671A-8A53-45DC-89D7BF8537F15A0D.png" width="120" height="40" loading="eager" style={{ maxHeight: '2.5rem', width: 'auto' }} /> </Link> <Link to ="/browse" className="text-lime-800 text-lg font-semibold hover:text-green-700"> Browse </Link> </div> </nav> </> ) }
This component renders the header above the restaurant results, and contains the browse link and logo. These allow you to navigate between routes.
Create the restaurant list component
Run the following command from your project root to create the
RestaurantList component:
touch src/components/RestaurantList.tsx
Paste the following code into src/components/RestaurantList.tsx:
import {Restaurant} from "../server/restaurants" type Props = { restaurants: Restaurant[] } export function RestaurantList({restaurants}: Props) { return ( <div className="overflow-hidden rounded-lg border border-gray-200 shadow-md"> <table className="w-full"> <thead className="bg-gray-50"> <tr> <th className="px-4 py-3 text-left text-sm font-bold text-gray-700">Name</th> <th className="px-4 py-3 text-left text-sm font-bold text-gray-700">Borough</th> <th className="px-4 py-3 text-left text-sm font-bold text-gray-700">Cuisine</th> </tr> </thead> <tbody className="divide-y divide-gray-200"> {restaurants.map((restaurant) => ( <tr key={restaurant._id}> <td className="px-4 py-3">{restaurant.name}</td> <td className="px-4 py-3">{restaurant.borough}</td> <td className="px-4 py-3">{restaurant.cuisine}</td> </tr> ))} </tbody> </table> </div> ) }
This component handles the display of the restaurants. The query data is handled as props, and the props are displayed within a table.
Configure application routing
Navigate to src/routes/__root.tsx. Replace the contents of __root.tsx
with the following code:
import { HeadContent, Scripts, createRootRoute, Outlet } from '@tanstack/react-router' import { QueryClient, QueryClientProvider } from '@tanstack/react-query' import '../styles.css' import {Header} from '../components/Header' //Configure TanStack Query Client with cache and retry options const queryClient = new QueryClient({ defaultOptions: { queries: { staleTime: 60 * 1000, // Data stays fresh for one minute retry: 1, // Retry failed requests once retryDelay: 1000 // Wait one second before retrying }, }, }) export const Route = createRootRoute({ component: () => ( <html lang="en"> <head> <HeadContent /> </head> <body> <QueryClientProvider client={queryClient}> <Header /> <main> <Outlet /> </main> </QueryClientProvider> <Scripts /> </body> </html> ), // Handle 404 errors for non-existent routes notFoundComponent: () => { return ( <div className="p-6"> <h1 className="text-2xl font-bold">404 - Page Not Found</h1> <p>The page you're looking for doesn't exist.</p> </div> ) } })
This file is a wrapper around your entire application. The code uses a
QueryClientProvider to ensure TanStack Query manages the data state.
Configure the home page
Navigate to src/routes/index.tsx. Replace the contents of index.tsx
with the following code:
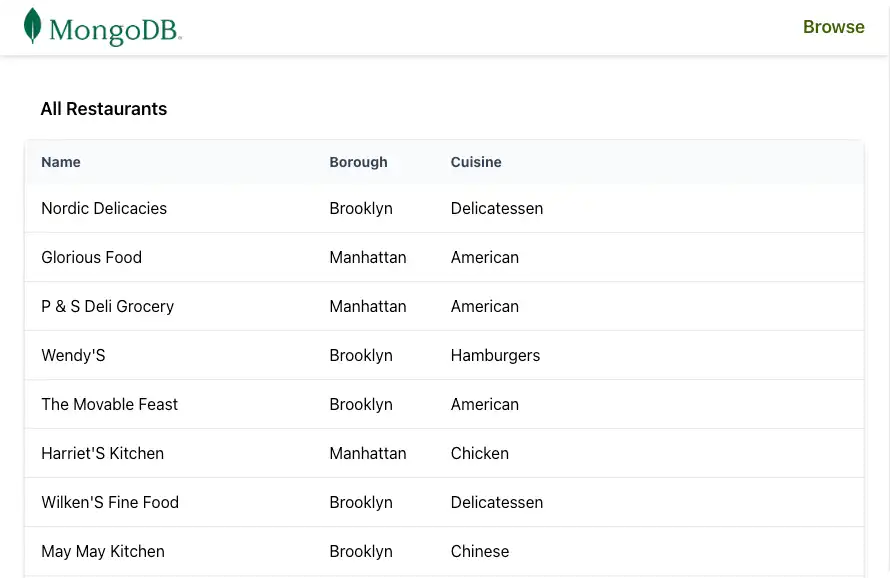
import { createFileRoute } from "@tanstack/react-router"; import {useSuspenseQuery} from '@tanstack/react-query' import { RestaurantList } from "../components/RestaurantList"; import { getAllRestaurants } from "../server/restaurants"; export const Route = createFileRoute('/')({ component: Home, pendingComponent: () => ( <div className="p-6 text-gray-500"> Loading restaurants... </div> ), errorComponent: ({error}) => ( <div className="p-6 text-red-600"> <h2 className="text-xl font-bold">Connection Error</h2> <p>{error.message}</p> <p className="text-sm mt-2">Please check your MongoDB connection string in your .env file</p> </div> ), }) function Home() { const{data: restaurants} = useSuspenseQuery({ queryKey:['restaurants'], queryFn: () => getAllRestaurants(), }) return ( <div className="w-full p-6"> <h2 className="text-lg font-semibold p-4">All Restaurants</h2> <RestaurantList restaurants={restaurants} /> </div> ) }
This route displays the results of the getAllRestaurants() by using the
Header and RestaurantList components.
Create the browse page
Run the following command from your project root to create the
browse.tsx route.
touch src/routes/browse.tsx
Paste the following code into src/routes/browse.tsx:
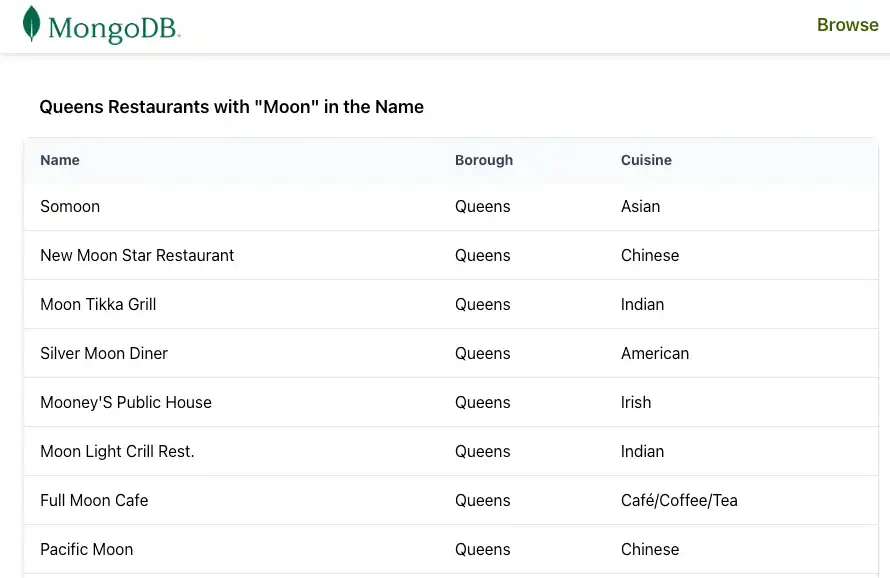
import { createFileRoute } from '@tanstack/react-router' import { useSuspenseQuery } from '@tanstack/react-query' import { RestaurantList } from '../components/RestaurantList' import { getRestaurantsByBorough } from '../server/restaurants' export const Route = createFileRoute('/browse')({ component: BrowsePage, // Display error UI if MongoDB connection or query fails errorComponent: ({ error }) => ( <div className="p-6 text-red-600"> <h2 className="text-xl font-bold">Connection Error</h2> <p>{error.message}</p> <p className="text-sm mt-2"> Please check your MongoDB connection string in your .env file </p> </div> ), }) function BrowsePage() { // Fetch filtered restaurants using TanStack Query // Query includes borough and search term in the key for proper caching const { data: restaurants } = useSuspenseQuery({ queryKey: ['restaurants', 'queens', 'moon'], // Unique cache key for this filtered query queryFn: () => getRestaurantsByBorough(), // Server function with MongoDB filter }) return ( <div className='w-full p-6'> <h2 className='text-lg font-semibold p-4'> Queens Restaurants with "Moon" in the Name </h2> <RestaurantList restaurants={restaurants} /> </div> ) }
This page displays a filtered query of the sample_restaurants database.
It displays all the restaurants in Queens with Moon in their name. It also
uses the Header and RestaurantList components.
Note
You may have red underline warnings in your IDE on the createFileRoute
lines until you run the server. This is normal. TanStack Router generates
the necessary TypeScript type definitions for your routes when you first
run the application with npm run dev. After the server starts,
the warnings will disappear.
Verify your file structure
Before continuing, ensure your file tree closely matches the structure below. You can safely ignore any additional project files.
your-app/ ├─ node_modules/ ├─ public/ ├─ src/ │ ├─ components/ │ │ ├─ Header.tsx <-- Logo and browse link │ │ ├─ RestaurantList.tsx <-- Table that displays results of DB query │ ├─ routes/ │ │ ├─ __root.tsx <-- Application wrapper │ │ ├─ browse.tsx <-- Browse page, holds results of getRestaurantsByBorough() │ │ ├─ index.tsx <-- Home page, holds results of getAllRestaurants() │ ├─ server/ │ │ ├─ restaurants.ts <--- Server functions │ ├─ lib/ │ │ ├─ db.ts <--- Database connection ├─ .env <-- Connection URI
Run Your Application
Follow the remaining steps to start the server and view the rendered restaurant data.
Start the server
Run the following command in your project root to start the development server:
npm run dev
If successful, the command outputs the following information in the terminal:
VITE v7.2.4 ready in 939 ms ➜ Local: http://localhost:3000/ ➜ Network: use --host to expose ➜ press h + enter to show help

Congratulations on completing the Quick Start tutorial!
After you complete these steps, you will have a TanStack Start application that connects to your MongoDB deployment, runs queries on sample restaurant data, and renders the results with real-time reactivity.
Additional Resources
To learn more about TanStack Start, the TanStack ecosystem and MongoDB, view the following resources:
TanStack Start documentation
TanStack documentation
Node.js driver documentation